At the risk of sounding insane, I'll disclose that when I'm bored or feeling restless, I love searching for new, challenging recipes to tackle. Case in point, I found myself in that bored, restless state a couple months ago and, after searching online for a long time, I came across a recipe for this Russian layer cake. I had googled a list of ingredients I knew I had on hand (think honey, flour, sugar), and after some Google-perusing, I found this.
There were a couple obstacles to overcome. The first: most of the recipes were actually in Russian. So it was after some extra searching that I found one translated roughly into English. Second: I had to convert the measurements from liters and grams to cups and teaspoons. Third: the recipe I found kept talking about how difficult the cake would be to make.
So why did I keep reading, you ask? Why not give up and just bake some cookies or something? Two words: Dobos torte. Yes, that's right, I'm referencing the Hungarian layer cake I made for Jen's birthday back in March that Gagi taught me a couple years ago. Now THAT is tough. And the very recipe for this Russian honey cake mentioned the infamous Dobos torte...stating that, if you thought this recipe was tough, check it out.
With that said, I knew I had it in me to try. After all, if I can make a Dobos...I can certainly conquer Medovnik, right?
Here's my version of the recipe, after several trial-and-still-tasty-errors. Think double the filling! Oh - and honestly, it's not difficult at all.
Ingredients
3 eggs, at room temperature
5 tbsp butter, at room temperature
1 + 1.5 cups castor sugar, separated
5 cups all-purpose flour
2 tsp. baking soda
3 tbsp. honey
1/4 tsp. salt
2 cups heavy cream
2 tsp. vanilla extract
2 cup sour cream
Directions
1. Preheat the oven to 355 degrees.
2. With a hand- or stand-mixer, beat together the eggs, salt and 1 cup sugar until light and fluffy, approximately five minutes.
3. Meanwhile, melt the honey and butter in a small saucepan over low heat, stirring to combine. Set aside to cool slightly.
4. When the sugar mixture is ready, mix in the honey mixture on low speed. Then add the baking soda and mix until incorporated.
5. Mix the flour into the sugar mixture in batches until just combined.
*Note: this batter will be thick, like a cookie dough. Don't fret - that's how it's supposed to be!
6. Divide the dough in half, and then in half again, so you have four parts. Line a baking sheet with parchment paper.
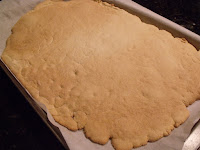
7. With a rolling pin, roll out one quarter of the dough on a well-floured surface. I roll it out as close to the shape of the baking sheet as I can. Once it is rolled, transfer the dough onto the baking sheet.
*Note: this is done by allowing the dough to roll itself around the rolling pin. Then unroll it in the opposite direction over the baking sheet. It should then lie pretty flat.
8. Bake for six minutes until golden brown. Remove from oven and set aside to cool.
9. Repeat steps 7 and 8 with the remaining dough.
10. While the layers are cooling, start the filling.
11. In a medium mixing bowl, whip the heavy cream, vanilla and 1.5 cups of castor sugar to form stiff peaks.
*Note: I tend to whip this a little longer than I normally would because you have to fold in the sour cream, which can easily deflate the mixture a little bit.
12. Once whipped, gently fold in the sour cream. Set in the refrigerator until the layers are ready to be frosted.
13. Trim off the edges of the layers and discard.
14. With a ruler, measure the layers into thirds. I find that each layer is about 5 inches wide and 10 inches long. You'll end up with about 12 layers.
*Note: these measurements are flexible based upon how big you roll out your dough.
15. Remove the filling from the refrigerator. Set one layer on your serving tray or container and spread a generous layer of filling on top.
16. Stack the second layer on top and spread with more filling.
17. Repeat with all the layers.
*Note: it's okay to let the filling run over the sides. You'll smooth this out anyway.
18. Once the last layer is placed, cover with filling and let it run down the sides. Using an off-set spatula, smooth the top and sides.
*Note: the filling may be runny at this point, and that's okay. It will stiffen as it sits in the refrigerator.
19. Refrigerate for 8 hours or overnight. This allows the filling to soften and moisten the layers.
*Note: It's so hard to wait, I know...but it's so worth it!


No comments:
Post a Comment