Sunday, October 31, 2010

Happy Halloween!


This weekend, I had the privilege of tagging along with Jen to watch her niece and nephew for a couple days. I had high hopes of baking some awesome cake or decorating some creative Halloween cookies for them, but time got away from me. Before I knew it, we were on the road to see the kids without any desserts in tow. And if you know me, you know this is not me.


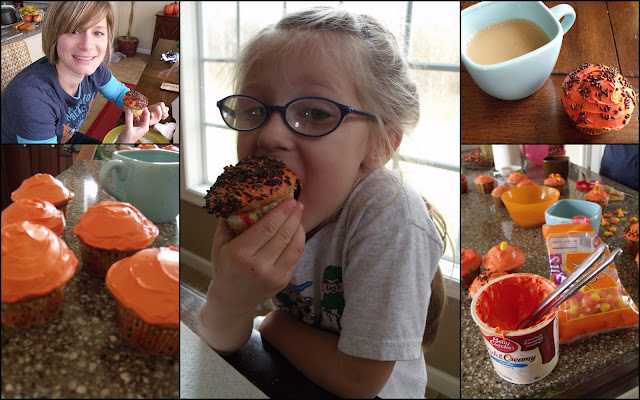
However, one thing my hurried pre-trip schedule afforded me was the chance to focus more on the moment than on a recipe. Sometimes, all you need is a box of cupcake mix, a tub of store-bought frosting and some sprinkles...and two the greatest kids I know.


No recipe to share today, but I thought I'd share some cute photos from our cupcake-decorating session.


Friday, October 29, 2010

Chewy Chocolate Chip Cookies


Cookies. The possibilities are endless. But I'm a fickle girl when it comes to this delicious treat. Give me a warm, chewy chocolate chip cookie (and a cold glass of milk) and I can eat a dozen. But give me a cookie that's hard, crunchy and flat, and I won't eat two bites.

As a frequent cookie-baker, I have a good-sized assortment of recipes at my disposal, but let me introduce you to my favorite cookie recipe. These chocolate chip cookies are soft and chewy, and they plump up perfectly every time. But every batch turns out a little differently because it's so easy to vary the add-ins. In the above photo, I added blanched, roasted almonds (chopped) that I had previously used in almond biscotti's. But get creative with this one - chocolate chips, butterscotch chips, mint chips, white chocolate, Reese's, macadamia nuts, walnuts, almonds...the list is endless. And the secret to this recipe? Jell-O pudding mix. Yes, that's right. Pudding mix. It's that "extra-special-something" that gives these cookies their plump. And if you vary the flavors, you have yet another way to play around with this recipe every time. 

Ingredients
2 1/4 cups all-purpose flour
1 tsp. baking soda
3/4 cup light brown sugar
1/4 cup granulated sugar
1/2 cup (1 stick) butter, softened
1 tsp. vanilla extract
1 (3.5 oz) package Jell-O instant pudding mix (I like Vanilla or Butterscotch)
2 eggs
1 (12 oz) bag semisweet chocolate chips (I like the Mini's from Nestle Tollhouse)

Directions
1. Preheat the oven to 375 degrees.
2. In a medium bowl, combine flour and baking soda. Set aside.
3. In a large mixing bowl, mix together the brown sugar, granulated sugar, butter, vanilla and pudding mix. Beat until the mixture is creamy, about 3-4 minutes.
4. Add the eggs and cream again, about 1-2 minutes.
5. Mix in the chocolate chips (or whatever else you decide to use).
6. Mix in the flour mixture, adding one third of the mixture and fully combining for adding the next third.
7. Line two cookie sheets with parchment paper (trust me - this is a great investment if you like to bake). Take one teaspoon-worth of dough, roll it in your palm to form a ball and place on the baking sheet. Repeat and place about one inch apart.
8. Bake for 6-8 minutes. Set aside to cool.

Sunday, October 24, 2010

Five-Herb Chicken & Vegetable Strudel Pockets


Last night, I had friends over for dinner after church and knew that we wouldn't be getting back until late. To make it easier on myself, I decided to find some recipes I could prepare ahead of time and throw in the oven when I got home.

For the main dish, I made Five-Herb Marinated Chicken (courtesy of Bobby Flay) that I began marinating the night before:

Ingredients
5 boneless skinless chicken breasts
1/2 cup olive oil
2 tbsp. each coarsely chopped fresh sage, parsley, tarragon, rosemary and thyme.
6 cloves garlic, coarsely chopped
Salt and pepper

Directions for Make-Ahead Prep
1. Chop the herbs and garlic and place in a gallon-size Ziploc freezer bag.

2. Add the olive oil, close the bag (letting out all the air) and combine the ingredients in the bag.
3. Salt and pepper the chicken. Reopen the bag and add the chicken.
4. Close the bag, again letting out all the air. This ensures that each part of the chicken will be covered with marinade. 
5. Massage the marinade over the chicken and put in the refrigerator overnight.

I found the Vegetable Strudel Pocket recipe in the Good Housekeeping's Step-by-Step cookbook. It was the first cookbook I ever owned, and I have to say it's really great for finding a variety of recipes with easy-to-follow directions. I tweaked it a little by adding onion and garlic to the filling, but everything  else I followed to the letter.

Ingredients
1 bundle asparagus, cut to 6" spears
1 lb. baby bella mushrooms, thinly sliced
1/2 white onion, thinly sliced
3 cloves garlic, minced
2 tsp. lemon juice
1/3 cup walnuts, toasted and finely chopped
2 tbsp. plain dried bread crumbs
12 sheets phyllo dough (if you buy it frozen, be sure it is thawed before you begin the recipe)
8 oz. Gruyere cheese, shredded
1 1/2 sticks butter, melted
Olive oil
Salt

1. Fill a large skillet with water and heat to boiling over medium-high heat. Add the asparagus and boil for 4-8 minutes or until asparagus is tender. Drain and set aside.

2. Wipe the skillet clean and add a couple tbsp. of olive oil. Heat and add onions, garlic and mushrooms. Saute for approximately 5 minutes until vegetables are softened and mushrooms are browned.
3. Add lemon juice to the skillet and stir for another 30 seconds. Remove from heat.
4. On the stovetop, toast whole walnuts in a dry pan until just browning. Remove and place in food processor. Finely chop the walnuts until they are the same size as the bread crumbs.
5. Mix bread crumbs and finely chopped walnuts in a bowl and set aside.
6. On a clean, dry work surface (this is important or the phyllo dough may stick and tear), take one sheet of phyllo dough and place it short side facing you.
7. Brush lightly with melted butter and sprinkle all over with 1/6 of bread crumb/walnut mixture.

8. Top with a second sheet of phyllo dough and lightly press together. (If you find that, at this point, your sheets of dough are tearing, simply layer them a bit. Some small tears are okay.)

9. Brush the second sheet with melted butter. Spoon 1/6 of grated cheese onto the dough 2" from the edge and 1 1/2" from each side so you have a border.

10. Top with 6-8 spears of asparagus, followed by the mushroom/onion/garlic mixture.

11. Fold the bottom of the phyllo dough over the mixture, then fold in the sides.

12. Finally, roll in jelly-roll fashion to form the pocket. (It kind of ends up looking like a burrito!)

13. Place the pocket seam-side down in a baking dish. Brush with melted butter and repeat to make five more pockets.

14. Cover and refrigerate until ready to bake.

Directions for Baking
1. Preheat oven to 400 degrees. 
2. Heat a grill- or saute pan over medium heat. Once heated, sear the chicken breasts on both sides to lock in juices.
3. Once seared, remove chicken breasts to a baking dish and bake in oven for 30-40 minutes or until center is cooked and juices run clear.
4. In the same 400 degree oven, uncover the strudel pockets and bake for 25-30 minutes or until crust is a golden brown.

(For dessert, I served Pumpkin Spice Bread)


Pumpkin Spice Bread & Pumpkin Butterscotch Cookies


In the spirit of my favorite season, Fall, and a need to use the can of pureed pumpkin in the pantry, I went on a search for a new pumpkin recipe. I somehow ended up on Martha Stewart's site (I don't usually attempt Martha's recipes, as I find them too time-intensive and requiring a lot of obscure ingredients and complicated techniques), but I instantly wanted to try her recipe for Ginger Pumpkin Bread. I ended up tweaking the recipe a bit, and it became much more like a pumpkin pie bread than Martha's ginger-heavy original.

Ingredients
1 1/2 sticks butter, melted
2 1/2 cups all-purpose flour
1 cup sugar
1 cup light brown sugar
2 tsp. baking powder
1 tsp. salt
1 (15 oz. can) pumpkin puree
3 large eggs
2 tsp. cinnamon
1/2 tsp. nutmeg
1/2 tsp. ginger
1/2 tsp. allspice
1/8 tsp. cloves

Directions
1. Preheat the oven to 375 degrees.
2. Grease one loaf pan (I have found the Pam Baking spray to work very well) and set aside.
3. In a large bowl, combine the flour, baking powder, salt and spices. Set aside.
4. In another mixing bowl, whisk together the sugar, brown sugar, pumpkin puree, butter and eggs.
5. Gradually add the flour mixture and stir until just combined (do not overmix).
6. Bake approximately 1 hour, 20 minutes or until a toothpick inserted in the center comes out clean.
7. Let cool for 10 minutes before removing from pan.
8. Once loaf is removed from pan and further cooled, drizzle with Martha's sugar glaze (see below)

Sugar Glaze
1 1/2 cups powdered sugar
2-3 tbsp. water

1. Slowly add water to powdered sugar and mix quickly. Stop adding water when glaze reaches desired consistency.

The pumpkin spice bread is a new favorite, for sure, but the following recipe is a go-to favorite that I've now made a couple of years in a row. It uses pumpkin, so it's perfect for Fall, and it's a delicious cake-like cookie that always gets good reviews.


Pumpkin Butterscotch Cookies

Ingredients
4 cups all-purpose flour
2 cups sugar
2 tsp. ground cinnamon
1 tsp. each nutmeg, ginger and allspice
1/2 tsp. cloves
2 tsp. baking soda
1 tsp. salt
1 (3 oz) package Jell-O butterscotch pudding mix
1 (15 oz) can pumpkin puree
1 cup vegetable oil
2 eggs
2 tbsp. milk
2 tsp. vanilla extract
1 (15 oz) bag butterscotch chips

1. Preheat oven to 375 degrees.
2. In a mixing bowl, combine flour, sugar, spices, baking soda, salt and pudding mix.
3. Add pumpkin, vegetable oil, eggs, milk and vanilla. Mix until well-combined. (If using a stand mixer, beat on medium speed).
4. Stir in butterscotch chips.
5. Drop by full tablespoons onto a greased cookie sheet.
6. Bake for 8-10 minutes. Let cool for 2 minutes before removing to a wire rack or parchment paper to cool.


Thursday, October 21, 2010

Homemade Pizza

Grad school has been particularly difficult this semester, between classes, internship and all the tests and projects. But the most challenging round of midterms to date are finally over, and what sounds more comforting than a homemade pizza?! 


In no way can I take credit for this recipe - I owe it all to my fabulous roommate, Jen, and her mom, Lilly. Lilly worked on this pizza crust recipe over and over, changing things here and there until it tasted great and baked to a perfect golden brown. She was kind enough to share the recipe with me. And Jen was kind enough to go out and buy all the ingredients for this pizza while I finished cramming for my last midterm. Thanks, ladies!

Lilly's Pizza Crust
3/4 cup warm water
1 envelope Active Dry yeast
2 cups all-purpose flour
3/4 tsp. sugar
1 tsp. salt
3 tbsp. olive oil


1. Pour envelope of yeast into warm water and set aside for 5 minutes.
*Note: sprinkle with a little extra sugar to feed the yeast so it fully develops.
2. In a large mixing bowl, add flour, sugar and salt. Mix together.
3. Add yeast/water and 3 tbsp. olive oil and combine (either with fork, hand- or stand mixer).
4. Shape dough into ball; cover with Saran Wrap or damp towel and leave for at least 1 hour; this allows the dough to rise, and it should double in size.
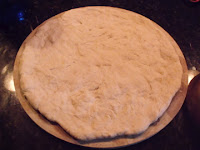
Before
After


Making the Pizza
5. After one hour, remove cover. Punch the dough with your fist a few times to release the air pocket that has formed.
6. If you will be baking the pizza on a baking sheet, brush it with a little olive oil (if you're using a pizza stone, you shouldn't need to brush it with anything).
7. Spread the dough into a pizza shape, starting from the center and pushing outward in all directions. Remember to leave a little more dough around the edges to form the crust.
8. Preheat the oven to 450 degrees and brush the crust with olive oil. Bake it for 10 minutes.

Ingredients
Tomato Sauce (I like to use a Tomato Basil or Tomato & Roasted Garlic sauce)
Freshly shredded cheese (I usually grab two kinds for variation of flavor, and this time used fresh mozzarella and fontina cheese)
Pepperoni
Thinly sliced baby bella mushrooms
Thinly sliced red onion
1/4 banana pepper, diced


9. Spread the sauce over the pizza to your desired amount. 
10. Sprinkle some of the shredded fontina cheese on the sauce; this will help the ingredients to better stick in place.
11. Top with thin slices of fresh mozzarella cheese.
12. Add pepperoni, followed by mushrooms, onion and banana peppers.
13. Top with the rest of the shredded fontina cheese.
14. Bake the pizza for 10 more minutes (you may need to vary the cooking time a bit depending upon whether you use a baking sheet or a pizza stone and depending upon how thick the pizza toppings are).
 
Thanks again, ladies!


Friday, October 15, 2010

Turkey Chili

Last winter, I made this chili probably every other week. It is hearty and full of flavor, and it can really warm you up on a cold day. I love this chili because:

1. All in all, it’s pretty healthy.
2. The ground turkey, beans and tomato sauce are essential, but you can take the liberty to add whatever vegetables and herbs you have/want/like to make it a little different each time.
3. It’s a great recipe to make when you have a lot of veggies stocked in the fridge and need to get rid of them quickly. As a matter of fact, that’s what inspired me to make it today (that, and my best friend/roomie, Jen, has been asking for it for a couple weeks!)

(I also enjoy toasting and buttering some bread to eat alongside it)

Ingredients
1 lb lean ground turkey
1 yellow onion
1 leek (white and light green parts only)
6 cloves garlic
2 red bell peppers
3 carrots, peeled
3 stalks celery
1 (15 oz.) can red kidney beans, black beans or cannellini beans
1 (15 0z.) can whole-kernel corn
1 (28 0z.) can white hominy
1 can Rotel tomatoes (with green chiles)
1 (28 oz.) cans Hunts crushed tomatoes
Olive Oil
Salt and pepper
Seasonings (I often use Lawry's seasoning salt, crushed red pepper and a mixture of dried thyme/fennel seed/basil/oregano)

1. Heat olive oil in a large pot on the stove over medium-low heat. Also, heat additional olive oil in a separate skillet.
2. Dice/slice the onion and leek. Mince the garlic.
3. Add the onions, leek and garlic to the heated olive oil and mix. Then dice the celery, carrots and bell peppers and add to the pot. Season with salt and pepper.
4. In the skillet, add the ground turkey to the heated olive oil, and season with salt and pepper. Sauté until brown.
5. Add the Rotel tomatoes and chiles to the pot and mix.
6. Drain and rinse the beans, corn and hominy. Add to the pot and mix.
7. Add the cans of tomato sauce and stir. Add the ground turkey.
8. Season with the aforementioned seasonings and dried herbs.
9. Cover and bring to a boil.
10. Once the pot comes to a bowl, reduce heat to low and simmer for 1 hour to ensure that the flavors blend and vegetables are tender.
11. Enjoy with fresh bread or freshly grated cheese.

Sausage and Lentil Soup


As the cooler fall weather sets in, nothing sounds better to me than a bowl of hot, hearty soup. Last year, I stuck to just a couple and rotated them throughout those colder months, but this fall, I have decided to diversify and try some new recipes.

I don’t know about you, but I love those Hillshire Farms sausages that you can buy in the deli meat section. So when I came across a recipe for a sausage soup, I couldn’t resist. As I usually do, I looked up several different recipes and combined my favorite parts together to form this recipe.

*Interesting tidbit: Sausage and Lentil Soup is a traditional Hungarian dish that is often served for New Year’s Eve. It is considered a “lucky” dish because lentils symbolize wealth (they are shaped like small coins).

Ingredients
1 lb. lentils
1 ½ large yellow onions
2 leeks, white and light green parts only
5 cloves garlic, minced
1 tbsp fresh thyme, minced
1 tsp ground cumin
5 stalks celery, diced
4 large carrots, diced
12 cups chicken broth
¼ cup tomato paste
1 pound Polska Kielbasa sausage
2 tbsp. red wine vinegar
Olive oil
Parmesan cheese, for serving

1. Begin by heating olive oil in a large pot on the stove over medium heat.
2. While the oil is heating, dice the onions, leeks, celery and carrots into small-medium pieces. Set the celery and carrots aside in a bowl and add the onions, leeks and garlic to the pot along with thyme, cumin, salt and pepper. Sauté for 20 minutes, covered.
3. Add the celery and carrots, and sauté for another 10 minutes, covered.
4. Add the chicken stock, tomato paste and lentils. Cover and bring to a boil.
5. Once the pot reaches a rolling boil, reduce heat to low and simmer for one hour.
6. While the soup is simmering, prepare the sausage. Cut the sausage in half lengthwise and place it on your cutting board flat-side-down. Then cut it again in half lengthwise and dice into small-medium pieces. You have essentially quartered the sausage, and I think this makes it easier to eat.
7. After the soup has simmered for one hour, add the sausage and red wine vinegar, and simmer until heated through.
8. Ladle into bowls and top with freshly grated Parmesan cheese.

(I also like to buy a fresh loaf of bread to slice and dip into the soup. If I have bread leftover and it doesn’t taste as fresh the next day, I like to spread some butter on it and place it under my oven’s broiler to toast. I owe credit to my roommate for this idea).

Wednesday, October 13, 2010

Cinnamon Apple Pie


What better place to start a blog about food than with a traditional recipe that also happens to be one of my favorite desserts? I made my first homemade apple pie in college, over three years ago, and though it tasted okay, it was by no means pretty. I had the hardest time fitting all the apples in, getting the dough into the pie pan without it tearing and baking it without weird lumps forming on top. Needless to say, I've kept at it and now I think I've tweaked a recipe and found a baking method that are easy and really tasty. Let me know what you think...


Making the Crust
2 cups all-purpose flour
1 tsp salt
1 tbsp granulated sugar
6 tbsp butter
6 tbsp Crisco butter-flavored shortening
4-6 tbsp ice water


1. In a large mixing bowl, combine the flour, salt and sugar.
2. Cut cold butter into small cubes and add to the flour mixture, along with the shortening. Mix with a hand- or stand-mixer until the butter is the size of peas.
3. Slowly add one tbsp. of ice water at a time until the dough comes together but is not too slimy.
4. Mold the dough into a ball and wrap in Saran Wrap. Refrigerate it for at least 20 minutes.


Making the Filling
5 apples [I prefer to mix 3 Granny Smith (green) with 2 Gala apples (red) to vary the flavor]
1/2 cup granulated sugar
1/2 cup light brown sugar
2 tbsp flour
3 tbsp cinnamon
1/4 tsp salt
1 tsp. vanilla extract
1 tbsp distilled vinegar

While the dough is chilling in the refrigerator, make the filling.
1. In another large mixing bowl, combine the sugars, flour, cinnamon and salt.
2.  Peel the apples one at a time. After each is peeled, core the apple and slice it into small pieces. I try to slice them pretty small so that I can fit more into the pie with less gaps in the filling like you might find with bigger pieces.
3. After each apple is peeled and sliced, add it into the cinnamon-sugar mixture and toss well. After all of the apples are mixed in, add the vinegar and vanilla extract and mix very well until all of the apple slices are coated.
Once the filling is done, the dough should be chilled enough to begin putting together the pie.
1. Place a piece of Saran Wrap on the counter and spread it out so there are no wrinkles.
2. Cut the dough in half and place one half back in the refrigerator.
3. Take the other half and form it into a ball. Place it on the Saran Wrap and cover it with a second piece of Saran Wrap.
4. With the dough in between the pieces of Saran Wrap, flatten it by pounding with an open hand. This makes it easier to roll out and keeps your counter free of messy flour.
5. Now, roll the dough out into a flat circle. Start in the middle of the dough and push outward from the center, alternating directions until it is about 1/8" thick.
6. Now, butter a 9 1/2" pie dish. This helps the crust not to stick during baking and allows for easy, clean removal of each piece of pie.
7. Remove the top piece of Saran Wrap and discard. Pick up the remaining piece of Saran Wrap with the dough (the dough will remain stuck during this process). Using your hands, flip the Saran Wrap so the dough is now on the bottom. Place it directly into the pie dish.
8. Once you have lined up the dough in the pie dish, remove the Saran Wrap and discard it. Then mold the dough into the dish so that it forms the crust. With a fork, poke holes in the dough so that steam can escape during baking. This also prevents it from overflowing.
9. Now, pour the filling into the dish. Make sure to get all the extra "goo" out of the bowl and into the pie.
10. Cut four tbsp of salted butter and disperse them over the filling. This will add some flavor and keep the crust buttery.
11. Now, take the other half of the dough out of the refrigerator. It's time to lattice the pie!

Latticing the Pie
(It's really not difficult at all!)
12. Roll out the remaining dough in between two sheets of Saran Wrap as you did with the bottom half until about 1/8" thick.
13. With a knife or pizza cutter, cut the dough into 14-16 strips. I prefer to use the pizza cutter, as I find it easier to make straighter strips.
14. Take one strip and lay it across the left side of the pie. Do this with 7-8 strips, depending upon the width of the strips, spacing them evenly. They will hang over the edge of the pie, and that's ok.
15. Once all the strips are evenly spaced and laid down, fold back every other strip.
16. Take another strip and lay it across the pie perpendicular to the strips you've already laid down. Then unfold the strips. It should now look like the strip you just laid down was woven into the pie.
17. Now, fold back the strips that you did not fold back before (these are the ones lying underneath the first perpendicular strip you laid down).
18. Place another strip perpendicularly across the pie and unfold the strips so they lay flat again.
19. Repeat this until your strips have all been laid down, continuing to alternate which strips you fold with each turn.
20. Once all your strips are in place, cut the extra ends of the strips off at the crust with a knife.
21. With your fingers, pinch each strip into the crust so that there are no gaps. You now have a perfectly latticed pie!
Baking the Pie
1. Heat the oven to 400 degrees. 
2. Create an egg wash (whisk one egg with a tbsp. of water), and brush it over the crust.
*Note: this helps facilitate a golden-browning of the crust.
3. Cut strips of aluminum foil and cover the edge of the pie. This will prevent your edges from burning during baking.
4. Place the pie on a baking sheet (to catch anything that spills over so your oven doesn't get dirty...it's also easier to take in and out of the oven this way). Bake in the oven for 40 minutes.
5. After 40 minutes, remove the foil and return to the oven for another 10 minutes
6. Let the pie cool a bit so the filling doesn't all spill out when you cut into it. Now, scoop yourself some ice cream (I think Breyer's Natural Vanilla...with the vanilla beans in it...is the best) and ENJOY!

(This is really good leftover if you just reheat a slice in the microwave with a fresh scoop of ice cream).